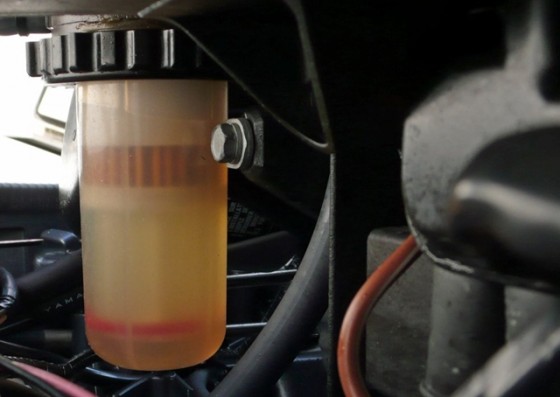
The spring brings warmer temperature, blossoms and clear sky, but unfortunately also water in our fuel tank. If we use alcohol-based winter additives, water could stay at the bottom of the tank.
There are two ways we could choose to solve this problem:

• Drain the tank:
It’s the simplest and probably the best option. The cost of removing the tank and draining it completely should be quite low.
• Use drying agent:
It is an alternative we should only take when we don’t have time to go the mechanic. The drying agent will emulsify the water so it will get mixed into the fuel-air vapour. The water will pass through the normal combustion process. It isn’t an ideal solution, because higher water content could make the combustion more inefficient and degrade the car’s performance.
We shouldn’t ignore effects of water accumulation inside the tank. Mold, fungus or algae could grow inside the tank, making the fuel dirtier and reduce the lifespan of the engine. Water could also encourage corrosion necessitation immediate tank replacement.
Fortunately, condensation in the fuel tank is something that we can easily avoid. Condensation occurs inside the gas tank due temperature changes. Half empty fuel tank is partially filled with air and water will condense in the cool morning during spring. The water will start to accumulate after a few weeks. For this reason, we should limit the volume of air inside the tank, to prevent water vapour from collecting.
Keep the fuel tank full or nearly full, whenever possible. This will reduce the empty space inside the tank and a good thing to do when it’s rainy or when it’s spring.
However, condensation is still less of a problem these days, because today, gasoline has some amount of ethanol in it. Gasoline with ten percent ethanol mixes better with water. It means, when there’s some amount of condensation inside the car, water will mix with the fuel vapour and it’s burnt in the combustion process.
It’s possible to clean the fuel tank of your car at home, but it’s important to refer to the owner’s manual. It helps us to understand how each part is connected to others. We should follow all the precautions mentioned. After the tank is removed, we need to drain it and make sure there’s no fuel in it. The next step is to mix fuel tank cleaner with some water and use the solution to rinse the tank of gasoline, rust and sediment.
Allow the solution to sit inside the tank for about 5 hours, to make sure most, if not all the rust, grunge, sludge and other contaminants dissolve into the solution. Drain the cleaner solution from the tank and rinse it thoroughly. We should repeat the process until the water look clear without sediments. Dry the tank by putting the drainage hole towards the ground for about 36 hours. Before putting the tank back, we should shake it and make sure there are no foreign objects inside.
Learn more on best seo services to help boost your online business presence.
Leave a Reply